Not a developer? Read this post first.
Warning: count(): Parameter must be an array or an object that implements Countable in /home/chris493/public_html/wp-includes/media.php on line 1176
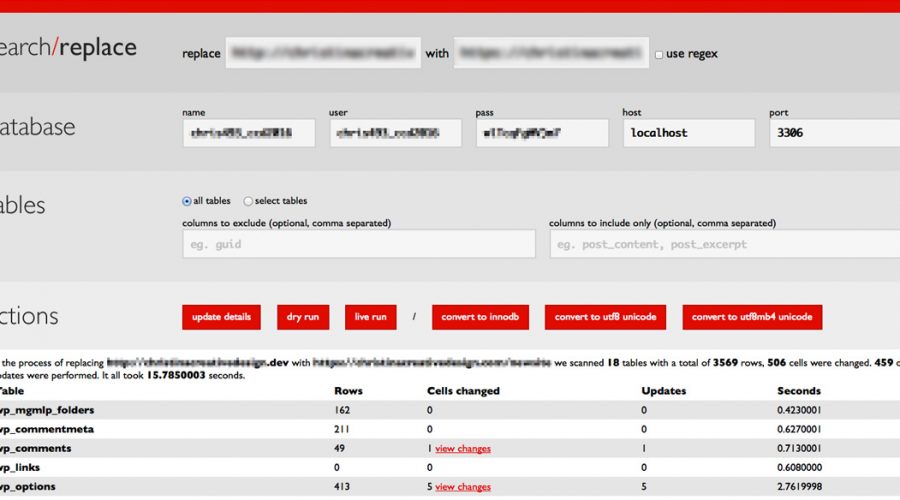
If you don’t want to lose your widgets, your CMB2 content, or other serialized data, the Search and Replace for WordPress Databases by interconnect/it is amazing!
I had a BUNCH of CMB2 fields and when I did a standard find and replace or a SQL query, my content was just not showing up when I moved my site. Widgets and CMB2 use serialized data. That stuff is completely over my head. Check out this descriptive post about array and indexes here.. You’ll also see that the OP now uses WP Migrate Pro ($90.00 – $1000.00). After spending a lot of time, money, and effort I didn’t want to spend more money.
Local Steps
- Zip your development (the entire site)
- Go to your dev’s phpMyAdmin (yourdevsite.dev/phpmyadmin)
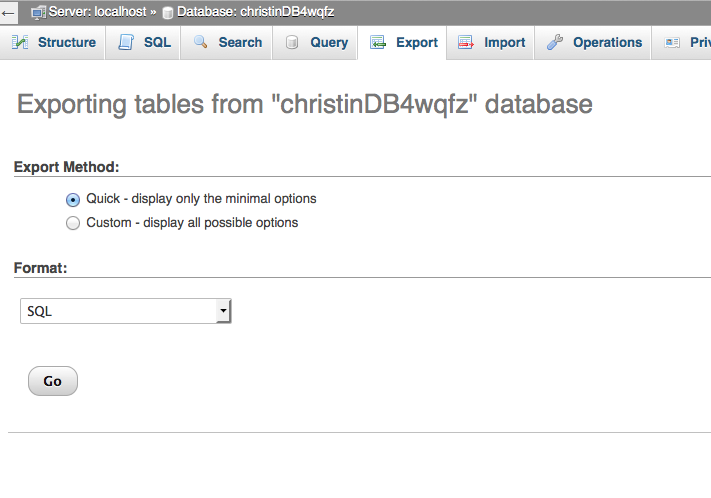
- Choose the database, then click Export

You will now have a nameofdatabase.sql in your downloads directory (or wherever you set that up).
Remote Server Steps
- Create an empty database on your remote server and assign a user to it with all privileges.
- Go to phpMyAdmin and choose that database, click the tab “Import” and import your local .sql file into the NEW database (do nothing else).
- Copy the zip folder of your development site to your remote server and unzip it. I use cPanel’s FileManager to do this and then I move the files outside the folder created by the .zip file and into the root of the new site.
Database Migration Steps
- In the same location as your wp-config.php file, create a folder named something strange. For example:
gzoddfv-your-search-replace-folder. A WP install will look like this:/gzoddfv-your-search-replace-folder
/wp-admin
/wp-content
/wp-includes - Open your wp-config.php file and change the name of the database, the user, and the password to the remote server’s database/username you set up in the previous steps.
- If you haven’t already done so, download the Search and Replace for WordPress Databases and unzip it, copy those files into your
gzoddfv-your-search-replace-folder. Do not put the files in the root, only put them in the folder you created. - In your web browser, go to the secret folder
livedomain.com/gzoddfv-your-search-replace-folderyou will see the Search and Replace for WordPress Databases interface. This will read the database credentials from the wp-config.php file. In the first of the first two fields, enter in the local domain and in the next enter the new domain. Assuming you have backups of everything, including the database, click dry run to test it or live run to run it. - Load your site it should be installed correctly with all the widgets and other serialized data exactly how it was on your local server. Login with the same username and password that you used on your local install.
Troubleshoot: Make sure your database credentials are correct in all respects. Make sure you didn’t use forward slashes in your new install (unless you are moving your live site to a folder). Also read the instructions on the Search and Replace for WordPress Databases page. Double check your .htaccess file to make sure that the rewrite base is RewriteBase /.
Last step: remove the gzoddfv-your-search-replace-folder.
All the best,

Affiliate Notice: I have affiliate links all over the place for companies I recommend. By purchasing through these links you help to support my family and to keep my blog going.


Add your Voice
Comment Policy: I accept clean HTML in comments, but don’t overdo it please. Please be kind to others.